Free Puffy Flower Keychain Crochet Pattern (Quick Gift)
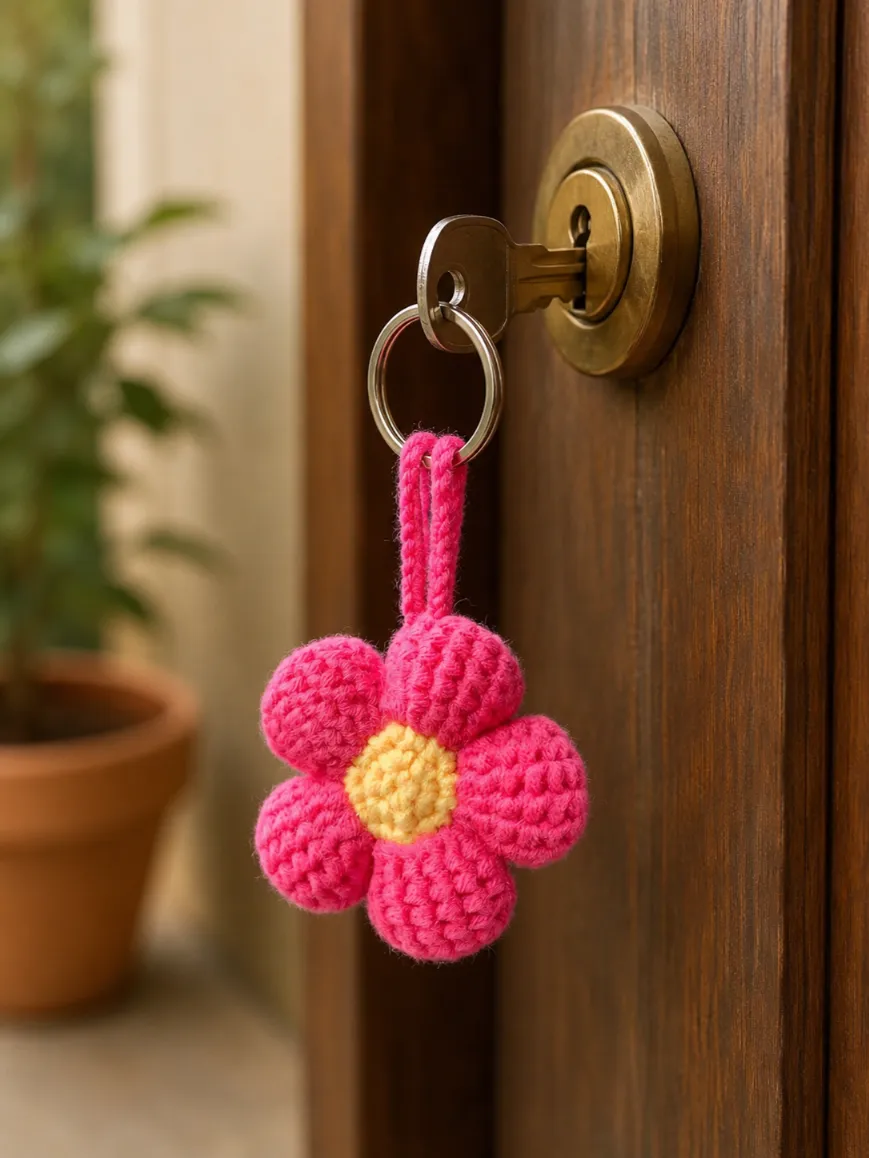
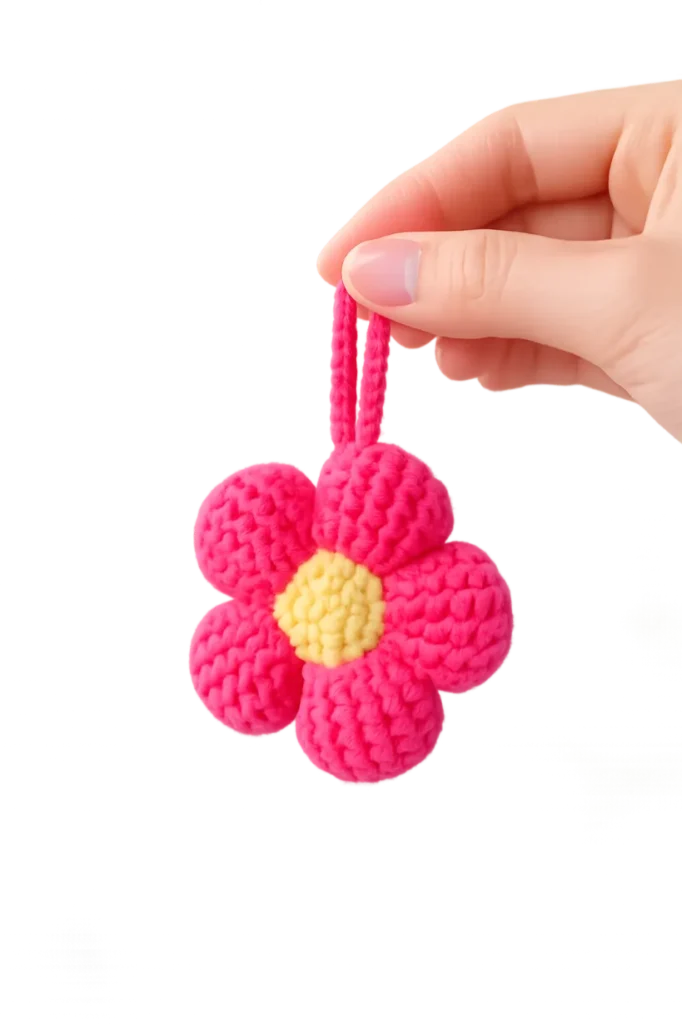
You know that feeling when you want to create something beautiful but don’t have hours to spend hunched over your hook? This Puffy Flower Keychain Crochet Pattern is exactly what you need. Whether you’re a crocheter looking for a quick handmade gift or someone who loves making tiny treasures, these adorable dimensional flowers are about to become your new favorite pattern. In just a couple of hours, you’ll have a finished keychain that looks like it took forever but we both know better.
Quick Info
Why You’ll Love This Pattern
This pattern combines intermediate techniques with beginner-friendly instructions, making it approachable even if you’re still learning your way around special stitches. The finished keychain is small enough to carry anywhere, bold enough to turn heads, and quick enough to make multiple gifts without losing your mind.
- Beginner-friendly: While marked intermediate, the clear step-by-step instructions break down the puffy petal technique so you can follow along even if you’ve never done this stitch before.
- Quick to make: Two flowers assembled in just 2–3 hours means you can start and finish this project in a weekend, making it perfect for last-minute gifting.
- Perfect gift: Keychains are universally loved give them to friends, teachers, coworkers, or keep one for yourself as a little reminder that you made something amazing.
- Free pattern: No sign-ups, no paywalls, and no mysterious links just honest crochet goodness ready for you to start stitching right now.
Materials Needed
Before you dive into this pattern, gather these simple supplies. Most of these items are probably already in your craft basket, making this an incredibly affordable project.
- DK weight cotton yarn in your chosen color(s) approximately 50–80 yards total (cotton drapes beautifully and shows off stitch detail perfectly for this puffy texture)
- 2.5 mm crochet hook this size creates the tight, defined stitches the puffy petals need to hold their shape
- Fiberfill stuffing just a small amount to lightly fill the flower and help petals stay dimensional
- Yarn needle essential for sewing the two flower pieces together and weaving in ends
- Scissors for cutting yarn cleanly
- Keychain ring or cord (optional) if you want to attach this to an actual keychain, a simple split ring or cord works beautifully
Pattern Notes & Abbreviations
Understanding the shorthand used in crochet patterns is half the battle. Here are all the abbreviations and special stitches you’ll encounter in this puffy flower pattern, explained in plain English.
- MR — magic ring (a foundation technique that creates a tight center)
- ch — chain stitch
- sc — single crochet (the shortest and tightest basic stitch)
- inc — increase (work two stitches into one stitch to add width)
- st — stitch
- sl st — slip stitch (joins rounds without adding height)
- psc — partial single crochet (the special stitch that creates the puffy texture see detailed explanation below)
Important pattern note: This pattern is worked in continuous rounds on the flower center, meaning you’ll join with a slip stitch at the end of each round. The petal technique uses a special partial single crochet stitch that leaves loops on the hook, which is then consolidated this creates that gorgeous puffy, dimensional effect.
Gauge & Sizing
The finished flower keychain measures approximately 2.4–2.8 inches (6–7 cm) across. Gauge isn’t critical for this project since it’s so small and decorative, but keeping consistent tension throughout will help your petals look symmetrical and professional. If you’re new to crochet, aim for even, medium-tight tension too loose and the petals flop, too tight and your hands will tire quickly.
The Free Puffy Flower Keychain (Quick Gift) Pattern
This pattern creates two identical flower pieces that are sewn together with a light filling for dimension. The magic happens in the petal construction, which uses partial single crochets to build up puffy, textured petals around a small center.
Make Two Flowers
Flower Center Round 1: With your chosen yarn color, create a magic ring. Working into the ring, work 5 single crochet stitches. You should have 5 stitches total. Pull the magic ring tight to close the center. Tip: Place a stitch marker here to track the beginning of your rounds.
Flower Center Round 2: Now you’ll increase in each stitch around to make room for the petals. Work an increase (2 sc in one stitch) in each of the 5 stitches. You’ll end this round with 10 stitches total. This doubled foundation is what gives your petals enough real estate to shine.
Flower Center Round 3: Here you’re increasing again, but this time with a staggered pattern: single crochet 1, increase 1, repeat around. You’ll work this pattern 5 times (sc, inc, sc, inc, sc, inc, sc, inc, sc, inc) to end with 15 stitches. You’ve now created the perfect base for five substantial petals.
Fasten off your center yarn or switch to a contrasting color for your petals if you want a two-tone effect. Leave a long tail if you plan to use this yarn to sew the flowers together later.
Petal Construction
The petals are what make this pattern special. Each petal uses the partial single crochet (psc) stitch, which means you’ll insert the hook, yarn over, pull up a loop, yarn over again, and pull through ONE loop only leaving the loop on your hook. This creates the puffy texture. Each petal spans 3 stitches of your flower center and has 6 steps.
Petal Step 1: Attach yarn to any stitch on your flower center. Chain 5. In that same stitch, work 5 partial single crochets, leaving each loop on the hook. Now insert your hook one more time into that same stitch and pull up a fresh loop. You should have 7 loops on your hook. Yarn over and pull through 2 loops twice (this consolidates your loops).
Petal Step 2: Chain 1 to transition. In the same stitch, work 6 partial single crochets, leaving loops on the hook. Pull up one additional loop from the same stitch. You’ll have 8 loops on the hook. Yarn over and pull through 2 loops twice to consolidate.
Petal Step 3: Move to the next stitch (the middle stitch of your 3-stitch petal base). Work 6 partial single crochets here, pull up one additional loop from this stitch, and you’ll have 8 loops on the hook. Consolidate again with yarn over and pull through 2 loops twice.
Petal Step 4: Return to the second stitch again. Work 6 more partial single crochets, pull up one additional loop, and consolidate your 8 loops as before.
Petal Step 5: Move to the third stitch of your petal (the last one). Work 6 partial single crochets, pull up one additional loop from this stitch, consolidate your 8 loops, and you’re nearly done with this petal.
Petal Step 6: Return one final time to the second stitch. Work 5 partial single crochets (one fewer than before), pull up one additional loop, and consolidate your 7 loops. Now insert your hook through all five puff sections and back into the center stitch to secure everything. Pull through and fasten off. One petal complete!
Repeat: Each petal is worked over 3 consecutive stitches of the flower center, and you have 15 stitches total, which means you’ll make 5 petals. Repeat the 6-step petal process until all five petals are complete. You now have one finished flower.
Assembly
Make a second identical flower using the same instructions. Once both flowers are complete, place them wrong sides together (so the pretty petal sides face outward). Using a yarn needle and your long yarn tail, sew around the edge using the inside loops only. Before you close the opening completely, lightly stuff the flower with fiberfill to help the petals maintain their puffy shape. Finish sewing and weave all yarn ends into the back of the flower.
Hanging Loop
Attach fresh yarn anywhere on the flower edge. Chain to your preferred length (6–8 chains is typical for a keychain). Join with a slip stitch back to the starting point to form a loop. Fasten off and weave in the ends.
Tips & Troubleshooting
Even experienced crocheters sometimes hit snags on new techniques. Here’s how to handle the most common challenges and make your flower absolutely perfect.
Yarn Swap
Don’t have DK weight? Worsted weight will work too just understand that your finished flower will be slightly larger (around 3 inches instead of 2.5 inches), and you’ll need a 3.0 or 3.5 mm hook to maintain appropriate tension. Fingering weight is too thin and won’t show off the puffy stitches well. Always choose a fiber that feels good in your hands cotton, wool blends, or acrylic all create beautiful results.
Common Mistake to Avoid
The #1 error is not leaving loops on the hook during partial single crochet. It’s tempting to pull through both loops like a regular single crochet, but you MUST leave that loop on the hook or the puff won’t form. If your petals look flat, this is your culprit. Slow down, breathe, and remember: leaving loops is what creates the magic.
Finishing Like a Pro
Lightly stuff your flower and we mean lightly. Too much fiberfill makes petals stiff and unnatural; too little and they droop. A piece of stuffing about the size of a marble is perfect. This simple step transforms a flat flower into a three-dimensional showstopper that catches light and looks handmade in the very best way.
What to Make With This Pattern
Once you’ve mastered this pattern, you’ll realize it’s a gateway drug to unlimited gifting possibilities. Every person on your list needs one of these or five.
- Teacher appreciation gifts: Make a bundle of three flowers in school colors and tie them together with ribbon for a meaningful, thoughtful gift that costs almost nothing.
- Bridesmaid gift additions: Crochet flowers in the wedding colors and attach them to gift bags or favor boxes for a personal, handmade touch guests will never forget.
- Plant pot charms: Skip the keychain ring and use these as decorative markers in potted plants or a garden bundle three together and label them with herb names for an easy gift for the gardening friend.
Frequently Asked Questions
Is this pattern really intermediate, or can a beginner do it?
The partial single crochet stitch is the intermediate element, but the detailed instructions break it down completely. If you’re comfortable with magic rings and basic single crochet, and you’re willing to follow step-by-step, you can absolutely do this as an advanced beginner. Don’t let the intermediate label intimidate you.
Can I make this pattern with different yarn weights?
Yes, but adjust your hook size accordingly. DK weight uses a 2.5 mm hook, worsted weight needs a 3.0–3.5 mm hook. The petal structure works with any weight, though thicker yarns create larger flowers. Always swatch a small section of your chosen yarn with your hook to see how it looks and feels before committing to the full project.
How long does it really take to finish one keychain?
With practice, you can finish one flower in 45 minutes to an hour. The assembly and hanging loop add another 15–20 minutes. So realistically, plan on 2–3 hours for your first one, and faster for subsequent flowers once your hands learn the rhythm. That’s still incredibly quick for such a gorgeous result.
Can I modify the pattern to make it larger or add more petals?
Absolutely. To make a larger flower, start with more stitches in your foundation rounds (try 6 or 7 sc in the magic ring instead of 5). More petals? Simply make more rounds with more stitches and work a petal on each set of 3 stitches. This pattern is flexible treat it as a foundation and customize it to your liking.
Pin this adorable puffy flower keychain so you always have the perfect quick gift ready!
Final Thoughts
You absolutely can make this pattern. That feeling of holding your finished puffy flower keychain seeing the light dance off the dimensional petals that’s what this hobby is all about. Screenshot this pattern, save it to Pinterest, and most importantly, start stitching today. Which color yarn are you reaching for first?