Quick Flower Crochet Coaster Pattern in Under 30 Minutes
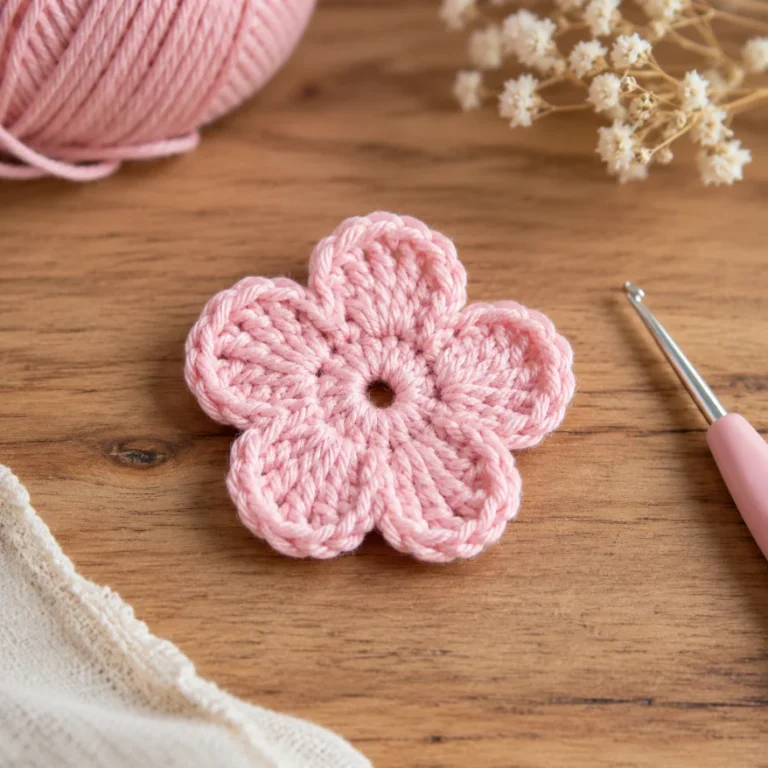
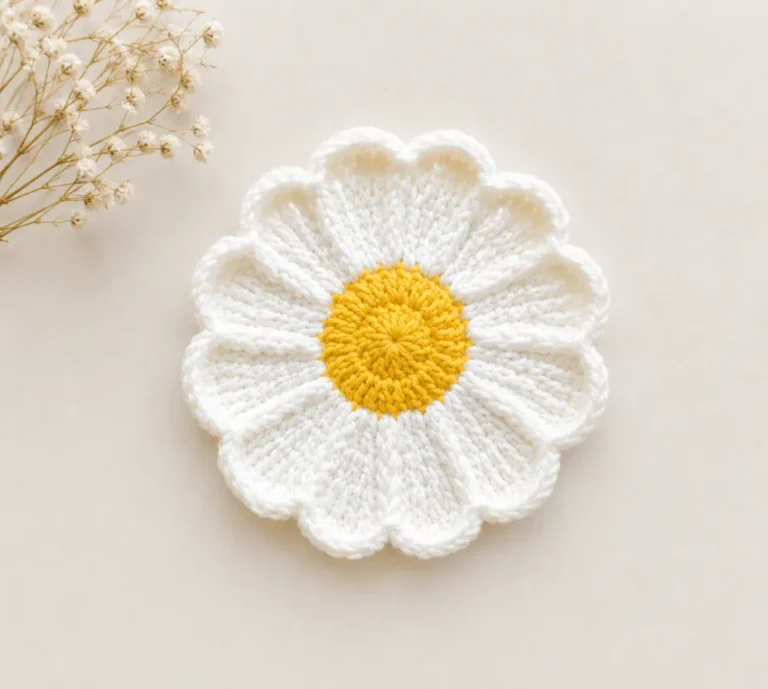
You know that feeling when you want to create something beautiful, but you don’t have hours to spare? A flower crochet coaster pattern is exactly what you need. This charming, quick design comes together in under 30 minutes, making it perfect for beginners and experienced crocheters alike who crave instant gratification. Whether you’re new to crochet or looking for a fast project that impresses, this delicate floral coaster will become your go-to pattern.
Quick Info
Why You’ll Love This Pattern
This easy flower coaster crochet tutorial checks every box for crafters who want results without the stress. It uses fundamental stitches you’ve probably already mastered, layered together to create an elegant dimensional flower that looks far more complicated than it actually is. The best part? You’ll finish before your coffee gets cold.
- Beginner-friendly: The pattern uses basic stitches like single crochet, double crochet, and simple post stitches no confusing abbreviations or advanced techniques to hold you back.
- Quick to make: Most crocheters complete this floral crochet coaster pattern in 20 to 30 minutes, making it perfect for a lunchtime project or quick gift.
- Perfect gift: Coasters are universally appreciated give a set to your coffee-loving friend, your mom’s book club, or as a housewarming gift with serious handmade charm.
- Free pattern: This complete crochet flower coaster free pattern is yours to keep, no email signup required, no hidden paywalls just pure creative joy.
Materials Needed
Before you pick up your hook, gather these simple supplies. You likely already have most of them in your craft stash, and if not, they’re inexpensive to source.
- Crochet hook: 4.5–5.5 mm (US 7–9) This size creates the perfect balance between drape and structure, allowing your flower petals to sit beautifully without becoming too stiff or floppy.
- Yarn: 40–60 yards of DK or light worsted weight Choose a solid color for definition, or go variegated for extra visual interest; cotton or cotton blends work wonderfully for coasters since they’re washable and durable.
- Scissors For cutting yarn cleanly between color changes or at the end.
- Tapestry needle Essential for weaving in those final loose ends so your coaster looks polished and finished.
- Stitch markers (optional) Helpful for marking the beginning of rounds, especially if you work loose tension and lose track of your starting point.
Pattern Notes & Abbreviations
This pattern uses standard US crochet terminology and includes some special stitches that create its signature dimensional look. Here’s a complete guide to every abbreviation you’ll encounter.
- ch chain stitch; the foundation of crochet
- sc single crochet; the shortest and tightest basic stitch
- hdc half double crochet; a stitch between single crochet and double crochet in height
- dc double crochet; a taller, more open stitch that creates drape
- FPdc Front Post Double Crochet; worked around the post of a stitch from the previous round to create dimension
- Popcorn Stitch A bobble made by working multiple stitches into the same stitch, then pulling the loop tight to create a 3D puff
- V-stitch (dc, ch 3, dc) in the same stitch; creates a V shape that forms petal bases
- sc2tog single crochet 2 together; a simple decrease that joins two stitches into one
- MR Magic Ring; a loop technique for starting in the round without a center hole
This pattern is worked in continuous rounds from a magic ring center. Chain stitches do not count as stitches unless otherwise noted. Use stitch markers to track the beginning of each round for accuracy.
Gauge & Sizing
Gauge for this coaster is approximately 16 stitches and 12 rows over 4 inches in single crochet. For a coaster, gauge is less critical than it might be for a garment, since you’re aiming for a functional, decorative piece rather than a precise fit. However, hook size will affect how quickly your coaster works up and how dense the fabric feels. If you prefer a stiffer, more structured coaster, use a smaller hook; for a softer, more draping fabric, go up a size. This pattern creates one standard coaster measuring approximately 4 inches square, perfect for holding a standard mug or glass.
The Quick Flower Crochet Coaster in Under 30 Minutes Pattern
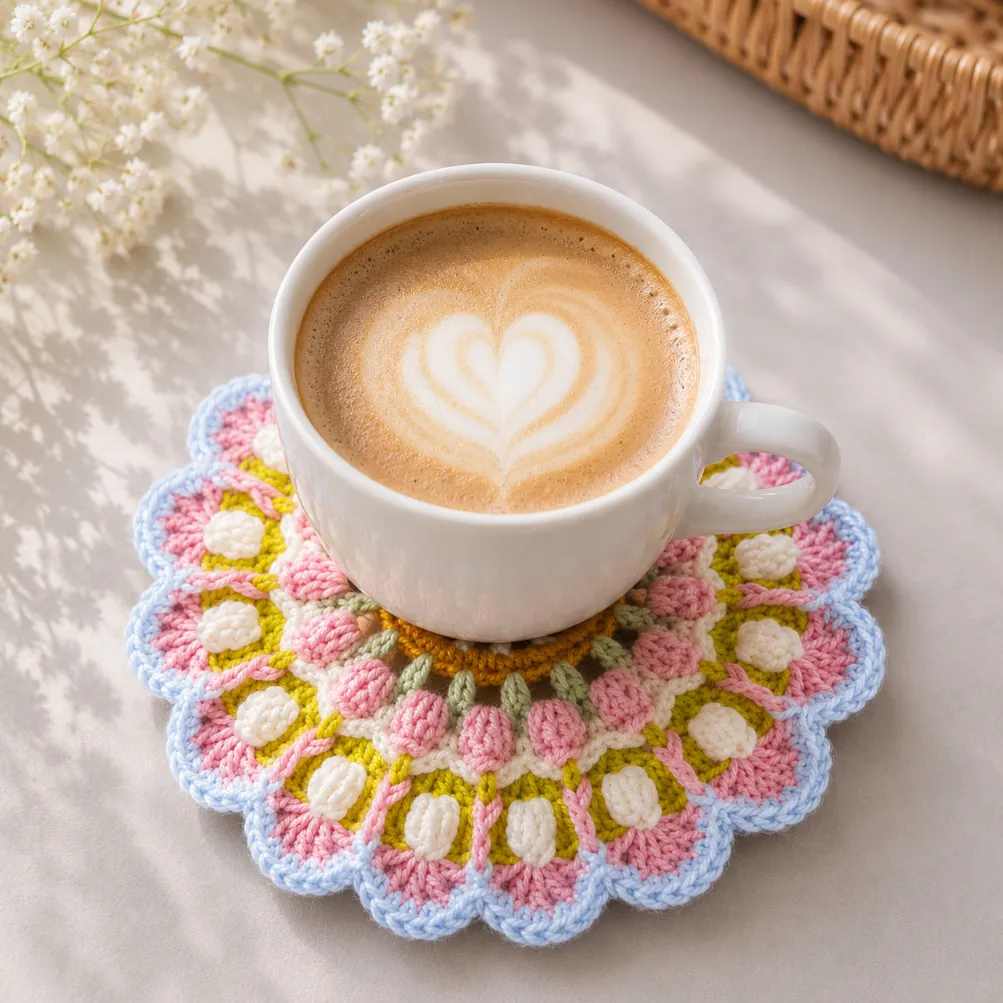
Round 1: Using a magic ring and your chosen yarn, work 12 double crochet stitches into the ring. Pull the ring closed gently. You now have 12 dc stitches forming a circle. This creates your coaster’s center base.
Round 2: In each of the 12 double crochet stitches from Round 1, work one single crochet followed by a chain 1. Work 12 times around. This creates an open, lacy foundation that will support your flower’s dimension. You now have 12 sc and 12 ch-1 spaces.
Round 3: Work one single crochet into each dc stitch from Round 1, and work 3 single crochet stitches into each ch-1 space. This round increases your stitch count significantly you’ll now have approximately 36 single crochet stitches total, filling in the gaps and creating a more solid base for the petals to attach to.
Round 4 Creating V-Stitches: Starting at any stitch from Round 3, work the following pattern: work one double crochet, chain 3, then work one double crochet into the same stitch (this forms one V-stitch). Skip the next 2 single crochet stitches, then into the very next stitch work one double crochet, chain 3, and one double crochet again (forming another V-stitch). Repeat this pattern skip 2 sc, then work a V-stitch all the way around. You’ll complete 16 V-stitches total. These V-stitches form the petal bases and create the structure for your flower’s layered look.
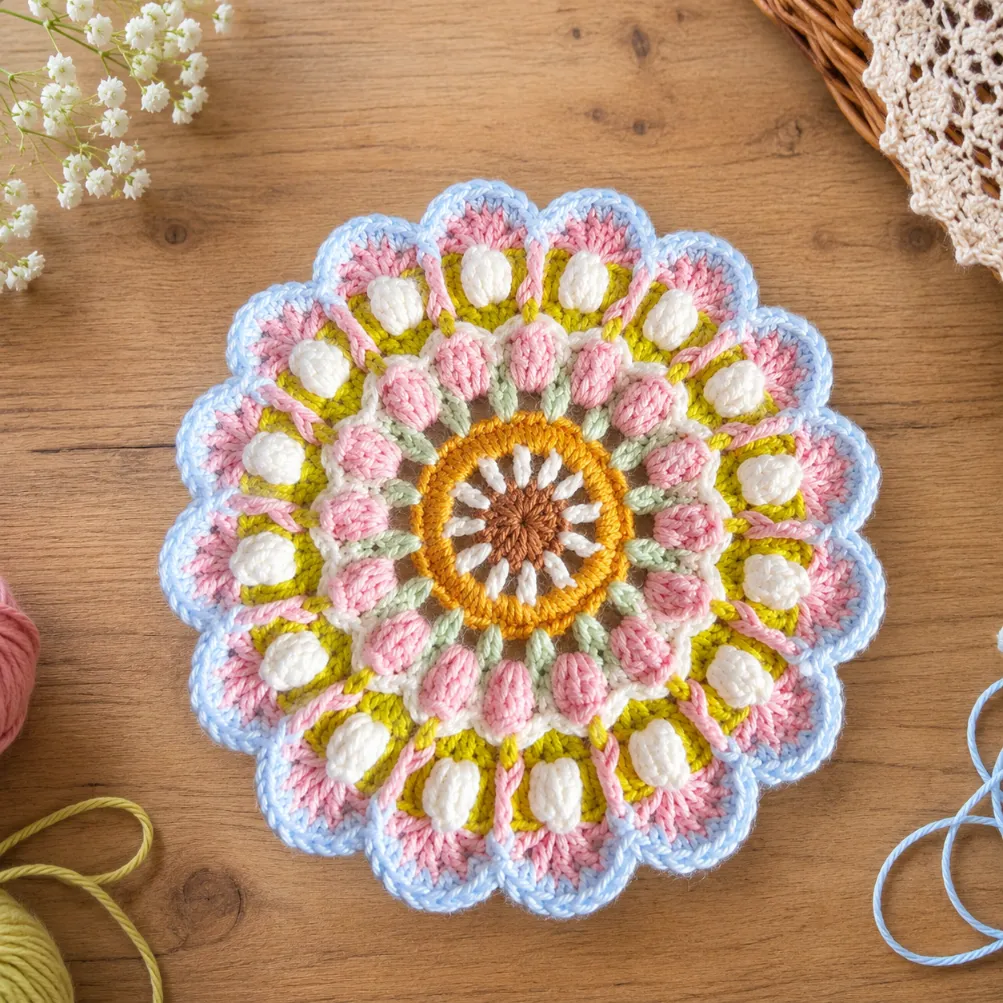
Round 5 Adding Popcorn Dimension: Between every two adjacent V-stitches from Round 4 (important: position yourself in the gap between two V’s, not inside one of them), work one popcorn stitch followed by a chain 3. Repeat this between each pair of V-stitches all the way around. You’ll have 16 popcorn stitches total, evenly spaced. These 3D puffs are what give your coaster its magical, dimensional flower appearance. The chain 3 spaces between them will be hidden in later rounds.
Round 6 Creating Petal Anchors: Locate one V-stitch from Round 4. Into the space formed by the chain 3 of that V-stitch, work one single crochet followed by a chain 5. Move to the very next V-stitch and work one single crochet into its ch-3 space. Repeat this pattern around, alternating between ch-5 and no chain between each sc. Important: while crocheting this round, keep the chain 3 stitches from Round 5’s popcorn stitches tucked behind your work they’ll be used soon. You’ll have 16 single crochet stitches and 8 chain-5 loops.
Round 7 Bridging the Petals: In the middle double crochet stitch of each group of 3 dc from Round 7 (if working from the previous round’s structure), work one popcorn stitch. On top of each popcorn stitch from Round 5, work one half double crochet. Between these stitches, work 3 double crochet stitches into the prepared spaces. While crocheting, also enclose the middle section of the chain-5 loops from Round 6 behind your fabric. This round is where everything starts coming together into a cohesive petal structure.
Round 8 Petal Centers: In the middle double crochet of each group of 3 dc from Round 7, work one popcorn stitch. Separate each with a chain 5. The single double crochet stitches on both sides of these groups will anchor the next round’s stitches. You now have 16 popcorn stitches evenly distributed, with chain-5 spaces between them.
Round 9 Filling Between Petals: On top of each popcorn stitch from Round 8, work one single crochet. Into the next dc from Round 7 (on either side), work 2 double crochet stitches. Into the hdc from Round 7, work 1 double crochet. Into the next dc from Round 7, work 2 more double crochet stitches. On top of the next popcorn stitch, work 1 single crochet. Repeat this sequence all the way around. You should have 5 dc stitches between every two popcorn stitches. Keep the chain-5 spaces from Round 8 tucked behind your fabric. This round defines the petal edges beautifully.
Round 10 Creating Half Petals: Into the sc on top of any popcorn stitch from Round 9, work the following: 1 dc, ch 1, 1 dc, ch 1, 1 dc, ch 1, 1 dc, ch 1, 1 dc. This forms one complete half-petal with 5 chain-1 spaces inside it. Immediately after finishing this half-petal, work one Front Post Double Crochet around any dc stitch from Round 7. Repeat this sequence (half-petal + FPdc) all the way around. You’ll create 16 half-petals total. These delicate chain spaces and post stitches are what give your flower its final, gorgeous petal definition.
Round 11 Finishing the Petals: For each half-petal from Round 10, work 2 single crochet stitches into each of the 4 chain-1 spaces (skipping the dc stitches between them). Each petal now has 8 single crochet stitches, creating a filled, dimensional petal shape. Into the space created by the Front Post Double Crochet from the previous round, work sc2tog (single crochet 2 together). Fasten off, weave in all remaining yarn ends with your tapestry needle, and give your coaster a gentle blocking if desired. Your flower coaster is now complete!
Tips & Troubleshooting
Even the simplest patterns can feel tricky the first time. Here are the expert tips that will make your crochet experience smooth and successful.
Yarn Swap
This pattern works beautifully with any DK or light worsted yarn, but consider cotton blends for the most practical coaster they’re durable, machine-washable, and won’t pill. Merino wool creates a softer, more luxe feel perfect for decorative coasters. For a stiff, structured coaster that really shows off your petals, choose a yarn with good stitch definition like a wool or wool blend.
Common Mistake to Avoid
The number-one beginner error with this pattern is losing track of where rounds end and begin, especially once the flower petals start forming. Use a stitch marker religiously place it at the very first stitch of each round and move it up as you progress. It takes two seconds and saves you from counting and recounting.
Finishing Like a Pro
After you fasten off, don’t just weave in your ends randomly. Thread your needle with the tail, weave it through the back loops of several stitches in the same row, then reverse direction and weave back through different stitches. This creates a secure anchor that won’t unravel with handling. A quick steam press (if your yarn allows) makes petals bloom beautifully.
What to Make With This Pattern
One coaster is charming, but imagine the possibilities when you make this DIY flower coaster crochet pattern multiple times. Here are our favorite ways to use this quick, beautiful design.
- Matching Set as a Host Gift: Make four or six coasters in complementary colors and present them tied together with ribbon it’s thoughtful, practical, and shows serious craft effort without looking like you spent hours on it.
- Seasonal Decorations: Create a spring set in pastels for Easter, autumn tones for fall, or jewel tones for winter décor. These coasters double as charming table décor.
- Craft Fair or Small Business: With a 30-minute timeline, you can batch-make these with beautiful variegated or gradient yarns and sell them at local markets, online shops, or gift fairs at excellent profit margins.
Frequently Asked Questions
Is this pattern really beginner-friendly, or will I struggle?
This pattern is designed for crocheters who know basic stitches like single crochet and double crochet. If you’ve made an easy crochet coaster pattern before, you have everything you need. The only new technique is the popcorn stitch and front post double crochet, both of which are thoroughly explained. Don’t let the word “flower” intimidate you it’s genuinely beginner-accessible.
What yarn colors work best for showing off the flower design?
Solid, light-colored yarns show the stitch definition beautifully cream, pale pink, baby blue, and soft green are stunning. Variegated yarn adds unexpected interest, though it may obscure some of the petal detail. Avoid very dark yarn unless you want a more subtle, sophisticated look. Cotton blends in spring colors feel especially fresh and modern for this design.
Can I make these coasters bigger or smaller?
The pattern creates a standard 4-inch coaster perfectly sized for mugs. To make it larger, use a thicker yarn or larger hook size; to make it smaller, use thinner yarn or a smaller hook. However, the stitch counts are designed for this finished size, so dramatic size changes will require pattern adjustments. For most crocheters, the original size is ideal.
How do I modify this pattern to make a small crochet flower for other projects?
If you love this design and want to use it as an appliqué on hats, bags, or blankets, you can stop after Round 10 and skip the final petal-filling round. This creates a flatter flower with just the dimensional petals showing, perfect for sewing onto other projects. You can also create small crochet flower tutorial variations by adjusting yarn weight and hook size for micro or oversized versions.
Pin this speedy flower coaster to your quick projects board for when you need a fast handmade gift
Final Thoughts
You absolutely can make this beautiful flower crochet coaster pattern and you’ll be shocked at how fast it comes together. This is the kind of project that reminds you why crochet feels like magic: simple yarn, a hook, and your hands create something dimensional and genuinely gorgeous. Save the pattern to Pinterest, snap a photo of your finished coaster, and tag us in your project we’d love to see your color choices and finished blooms!