Kitty Hair Clip Crochet Pattern for Beginners (So Easy And Free!)
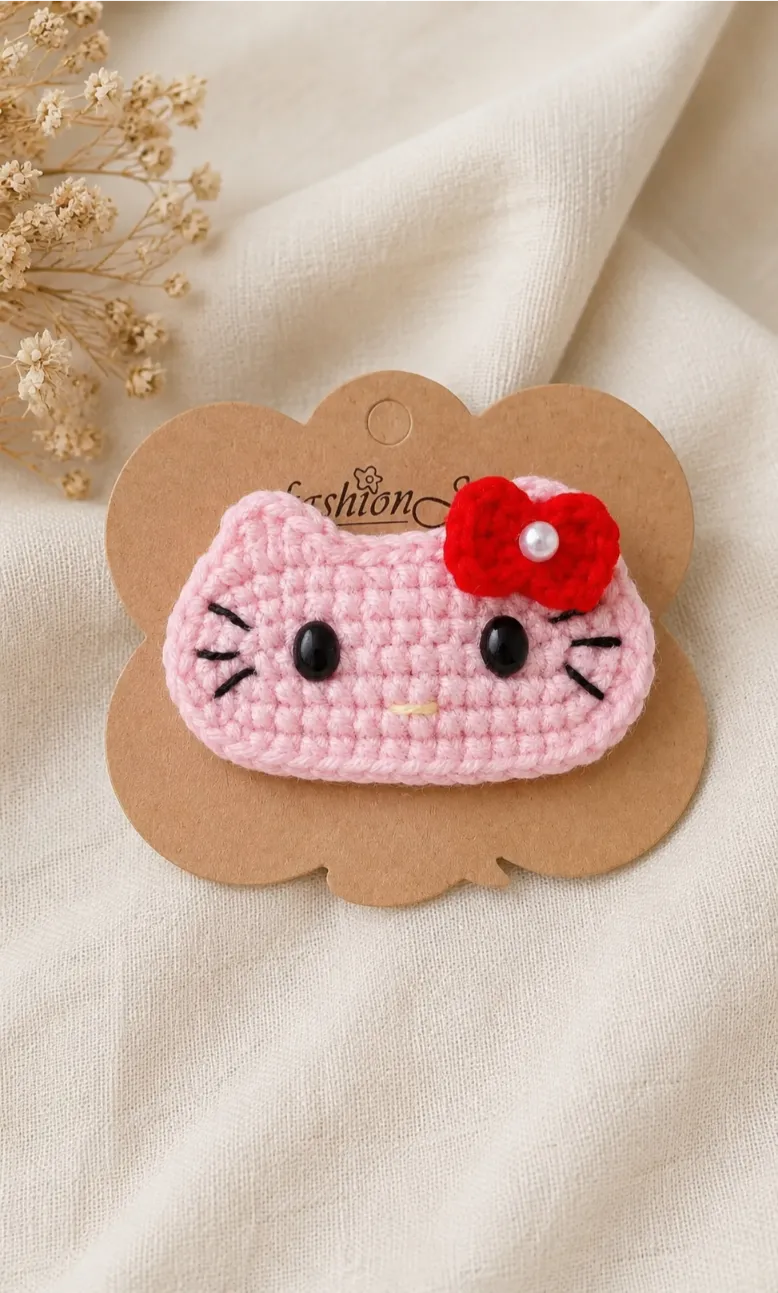
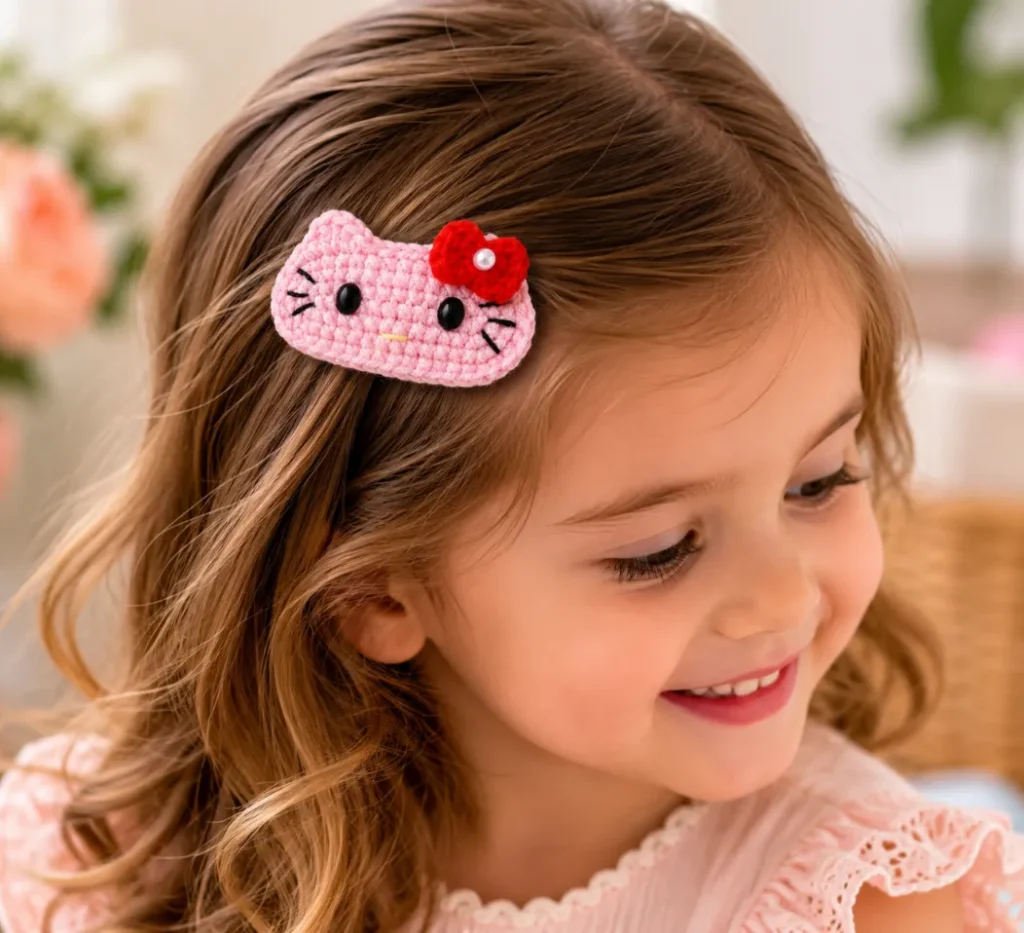
You know that feeling when you see the cutest little handmade accessory and think, “I absolutely have to make that”? This kitty hair clip crochet pattern is exactly that moment. Whether you’re a complete beginner picking up a crochet hook for the first time or you’re looking for a quick, confidence-boosting project, this adorable cat-themed hair clip is about to become your new favorite thing to stitch. Perfect for gifting to kids, keeping for yourself, or whipping up a batch as party favors, this pattern is simple enough to complete in an afternoon and charming enough to make everyone ask, “Where did you get that?”
Quick Info
Why You’ll Love This Pattern
This crochet cat hair clip pattern ticks every box for a perfect beginner project. It combines basic stitches you’ll use forever with instant gratification you’ll have a finished, wearable accessory before you know it. The design is forgiving enough that small mistakes won’t show, yet detailed enough to feel genuinely accomplished when you’re done.
- Beginner-friendly: Uses only basic stitches like single crochet, increases, and decreases no tricky stitch work required.
- Quick to make: From yarn to finished clip in just 1 hours, making this perfect for quick beginner crochet patterns you can complete between coffee and dinner.
- Perfect gift: Kids adore these, craft lovers collect them, and they’re small enough to tuck into birthday cards or goodie bags.
- Free pattern: No signup, no paywalls just print it out, grab your hook, and start stitching today.
Materials Needed
Before you start, gather these supplies. Everything is standard and affordable most crocheters already have these items in their stash.
- 2.5 mm crochet hook This smaller size creates tight, neat stitches that give your finished clip a polished appearance and perfect fit over the metal snap.
- Sport weight cotton yarn in light pink, red, and yellow Cotton gives the cleanest finish and holds its shape beautifully; sport weight is perfect for small amigurumi projects like this.
- Black embroidery floss For the whiskers and details that bring your kitty to life.
- 5 cm metal snap hair clip Look for these in craft stores or online; they’re inexpensive and durable.
- 6 × 8 mm black safety eyes The personality of your clip depends on these tiny eyes.
- Small pearl bead (optional) Adds a sweet decorative touch to the bow.
- Fiberfill stuffing (small amount) Light stuffing gives shape without bulk.
- Yarn needle For sewing pieces together and weaving in ends.
- Scissors Sharp yarn scissors are a crocheter’s best friend.
Pattern Notes & Abbreviations
This pattern uses US crochet terminology and standard abbreviations. Familiarize yourself with these terms before you begin they’re universal across all crochet patterns and you’ll use them forever.
- ch – chain stitch, the foundation of most crochet projects.
- sc – single crochet, the shortest and tightest basic stitch.
- inc – increase, made by working 2 single crochets in the same stitch to add width.
- dec – invisible decrease, a technique that joins two stitches together neatly.
- sl st – slip stitch, used to join rounds or move yarn across without adding height.
- hdc – half double crochet, slightly taller than single crochet.
- dc – double crochet, the tallest basic stitch.
- MR – magic ring, an advanced foundation technique that creates a closed center.
- FO – fasten off, the way you secure your yarn at the end.
One important note: Numbers in parentheses (like 26, 32, 38) show the total stitch count at the end of each row. Count your stitches before moving to the next row to catch any mistakes early.
Gauge & Sizing
This pattern finishes at approximately 2¾ inches wide by 1¾ inches high the perfect size to fit a standard 2-inch metal snap hair clip. Gauge isn’t critical for this tiny project since it’s not worn against the body, but working with the recommended 2.5 mm hook and sport weight yarn ensures your finished piece fits snugly over the clip without gaps or excess fabric.
The Kitty Hair Clip Crochet Pattern
Before you begin: This pattern is made in two identical flat pieces (front and back panels) that are crocheted together around a metal hair clip. The ears, bow, and facial details are added after assembly. Follow the stitch counts carefully they’re your guide to success.
Front Panel (make 1):
Foundation: Chain 13. This creates your base row.
Row 1: Starting in the second chain from hook, work 11 single crochet stitches along the chain. Then work 3 single crochets in the last chain (this is an increase that creates the rounded corner). Continue working on the opposite side of the chain with 10 single crochets, then work 2 single crochets in the last stitch. You should have 26 stitches total. Turn your work.
Row 2: Begin with an increase (2 single crochets in the same stitch). Work 10 single crochets. Then work 3 increases (that’s 3 single crochets, each followed by another single crochet in the same stitch repeat this pattern 3 times). Work 10 single crochets, then 2 increases. Turn. You now have 32 stitches.
Row 3: Work 1 single crochet, then 1 increase. Work 10 single crochets. Then alternate single crochet and increase 3 times (sc, inc, sc, inc, sc, inc). Work 10 single crochets. Alternate single crochet and increase 2 times (sc, inc, sc, inc). Turn. Total: 38 stitches.
Row 4: Single crochet evenly around all 38 stitches. This smooths out any bumps and creates a finished edge. Fasten off, but don’t cut your yarn yet.
Back Panel: Repeat the Front Panel exactly as written all four rows with identical stitch counts. Do not fasten off yet; you’ll use this yarn to join both pieces.
Joining the Panels: Place your front and back pieces together with the right sides facing out (wrong sides facing each other). With your yarn still attached to the back panel, single crochet through both layers around the entire perimeter. When you reach the bottom opening, insert your metal snap hair clip before closing completely. Lightly stuff the clip cover if desired for a plumper appearance. Join with a slip stitch and fasten off.
Ears (Make 2): Using the magic ring technique, work 4 single crochets into the ring. Round 2: Work 2 single crochets in each stitch (8 total). Round 3: Work 1 single crochet in each stitch around. Flatten the ear by folding it in half. Sew one ear to each top corner of your finished clip with the yarn needle.
Bow: Create the center ring using a magic ring with 6 single crochets. Join with slip stitch. For the left loop: Chain 5, then work 4 single crochets back down the chain. Repeat this once more to create two loops on one side. Wrap yarn around the center to cinch it. Repeat the loop process on the right side. Attach the bow to the right ear. If desired, sew a small pearl bead in the very center of the bow for extra sweetness.
Eyes: Insert your black safety eyes between Rows 2 and 3, leaving approximately 8 stitches between them for proper spacing and realistic cat expression.
Nose: Using yellow embroidery floss, embroider a small horizontal stitch just below the eyes to create a cute little kitty nose.
Whiskers: Thread your black embroidery floss through the yarn needle. Embroider three whiskers on each side of the face, starting from the nose area and extending outward. This is where your kitty gets true personality!
Finishing: Attach the bow securely to the right ear with yarn and needle. Weave in all remaining yarn ends with your tapestry needle, tucking them into the stitches so they don’t show. Steam lightly with an iron if needed to smooth out any wrinkles or uneven stitches.
Tips & Troubleshooting
Every crocheter hits a snag now and then here’s how to handle the ones you might encounter with this pattern.
Yarn Swap
Don’t have sport weight cotton? Worsted weight cotton works fine; just expect your clip to be slightly larger and use a 3.5 mm hook instead. Acrylic yarn is acceptable but won’t hold its shape quite as crisply. Avoid fuzzy or textured yarns they hide your beautiful stitches.
Common Mistake to Avoid
The biggest beginner error is not keeping stitches tight enough, which leaves gaps and makes the clip cover slide around on the metal. Keep steady tension throughout and don’t skip the full stitch each one matters. Count stitches at the end of every row before moving forward.
Finishing Like a Pro
The secret to a polished look is weaving in ends immediately after assembly. Don’t let them dangle thread them through several stitches with your needle and trim closely. This prevents loose threads from unraveling and creates that handmade-but-intentional appearance that makes gifts special.
What to Make With This Pattern
Once you’ve made one, you’ll want to make dozens. Here are some inspired ways to share this adorable crochet hair clip pattern with the people you love.
- Birthday Party Favors: Make a batch in different colors and give them to party guests kids will be thrilled with a handmade accessory they can actually wear home.
- Stocking Stuffers: Tuck these into Christmas stockings or holiday gift boxes for instant charm without taking up much space.
- Craft Fair Stars: These sell quickly at local craft markets and online because they’re unique, affordable, and appeal to cat lovers of all ages.
Frequently Asked Questions
Is this pattern really suitable for complete beginners?
Absolutely! This pattern uses only single crochet, increases, and decreases the fundamental stitches every crocheter needs to master. If you can chain and single crochet, you can make this clip. It’s actually an ideal first project because it’s small enough to finish quickly and the mistakes are forgiving.
Can I use a different yarn weight or type?
Sport weight cotton is recommended for the best results, but worsted weight cotton will work just adjust your hook size to 3.5–4 mm and expect a larger finished clip. Acrylic yarn is acceptable but less structured than cotton. Avoid super bulky or stretchy yarns as they won’t hold the tight shape needed for a professional-looking clip.
How long does this project actually take?
Most crocheters complete this in 1 hours, including assembly and embroidery details. Beginners might take 10 Min to 1 hours. The beauty of small beginner crochet projects like this is that you see results fast, which keeps your motivation high.
Can I modify the design or make it different colors?
Completely! Try pastels, bright neons, stripes, or even seasonal colors. The bow can be any color too. You can also skip the pearl bead, add more details like a tiny crocheted flower, or use different embroidery stitches for the whiskers. Make it your own!
Pin this adorable kitty clip pattern so you can stitch up sweetness whenever inspiration strikes!
Final Thoughts
You absolutely can create something this adorable don’t doubt yourself for a second. This pattern is proof that beautiful, gift-worthy items don’t require complicated techniques or hours of work. Pick your colors, grab your hook, and let your hands do what they do best: transform simple yarn into something magical. Drop a comment below and tell me which color kitty you’re making, or snap a photo and tag us on Pinterest with your finished clip!